Interaction - animations and effects
Animations
Animation refers to the animated transition process of movement from one page to another when designing interactions. You can select the desired animation after setting the trigger and action for an interaction.
Animation types
As of now, Creatie supports the following types of animations:
- Instant
- Dissolve
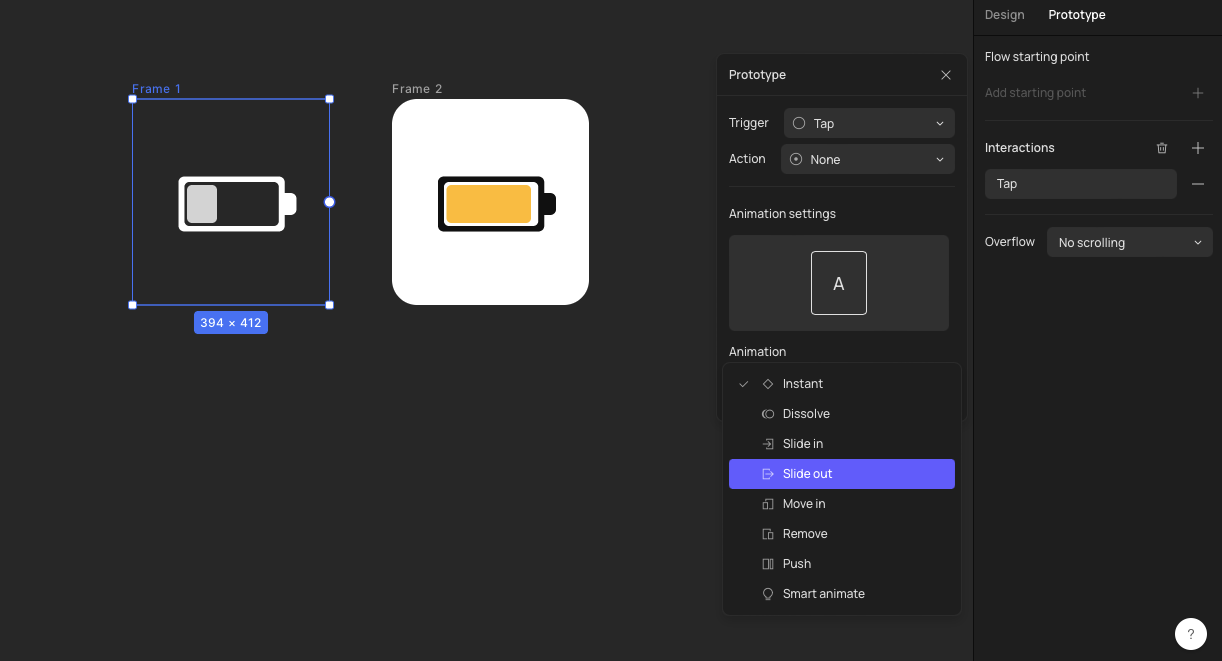
- Slide in
- Slide out
- Move in
- Remove
- Push
- Smart animate
Using smart animate
Smart animate enables automatic tweening animations between two keyframes. When you apply smart animate, you can clearly see the gradient process between these two shapes.
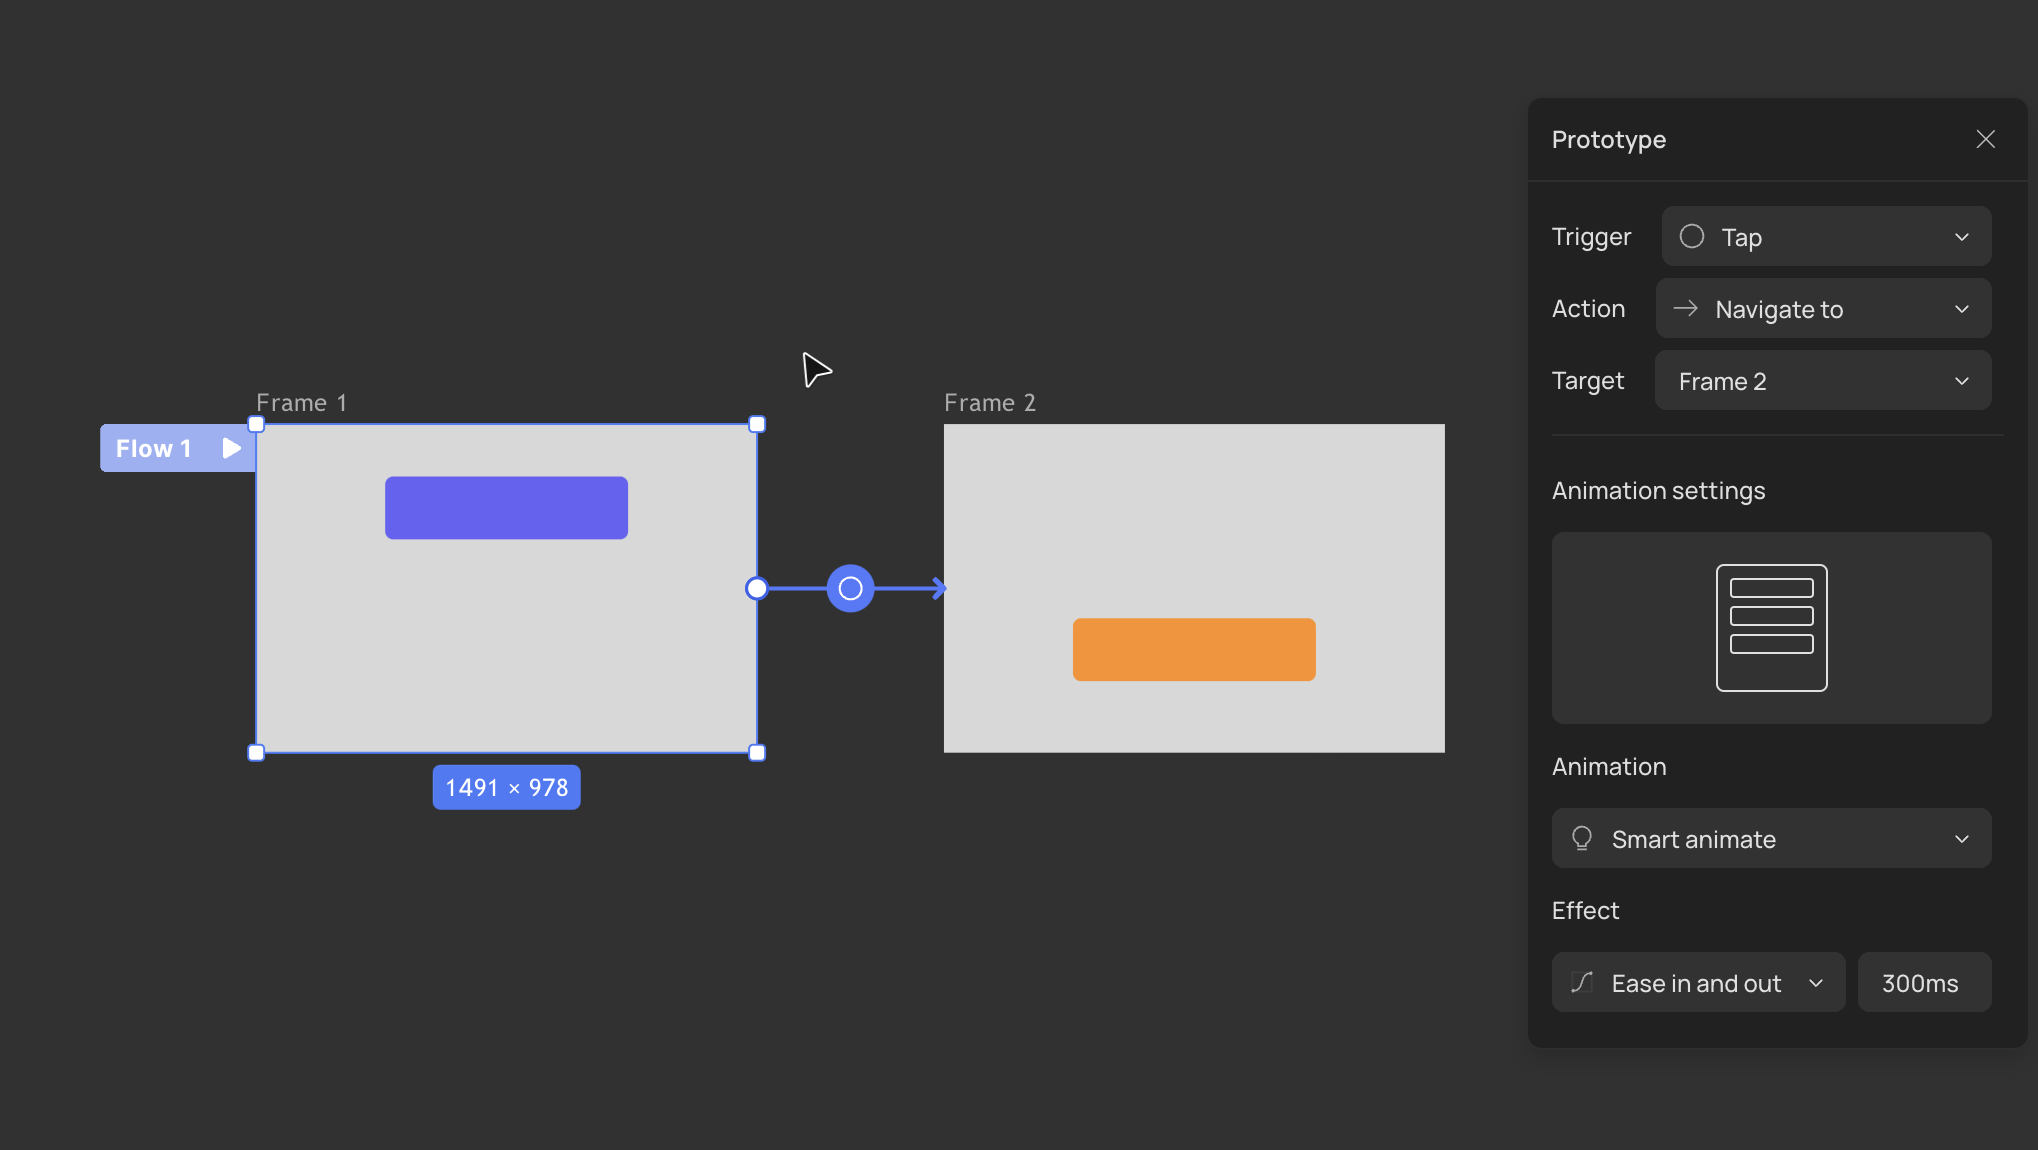
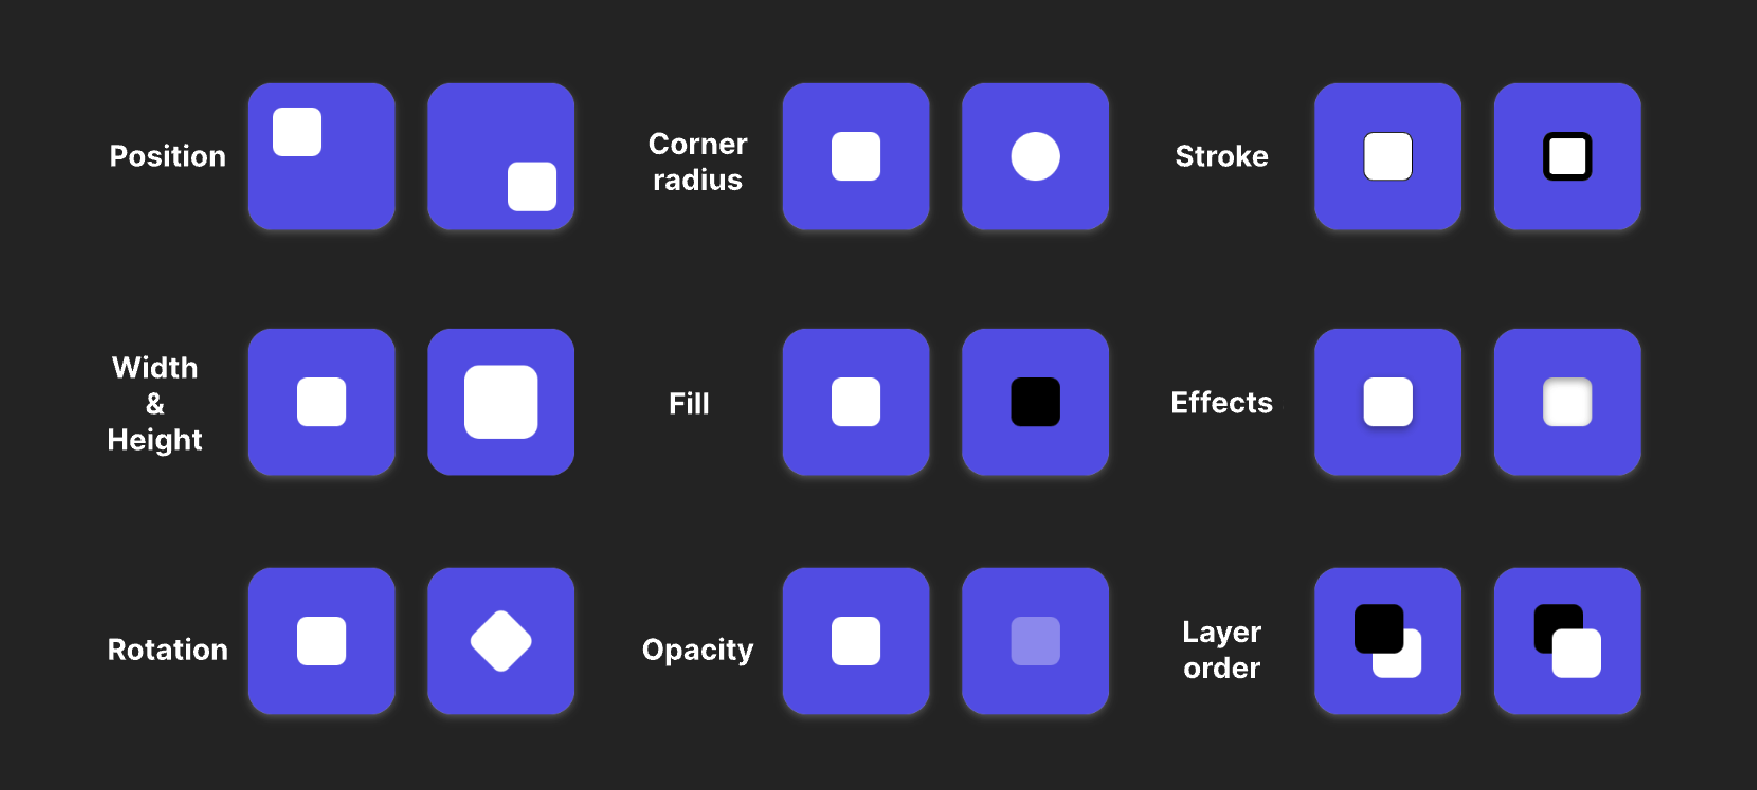
When layer properties such as position, width & height, rotation, corner radius, fill, opacity, stroke, effects and layer order change, Creatie can recognize the change and apply transition automatically to animate between layers.
Note: For smart animate to take effect, the two layers involved in the animation must have identical names. Otherwise, fade-in and fade-out will take effect even if smart animate is set.
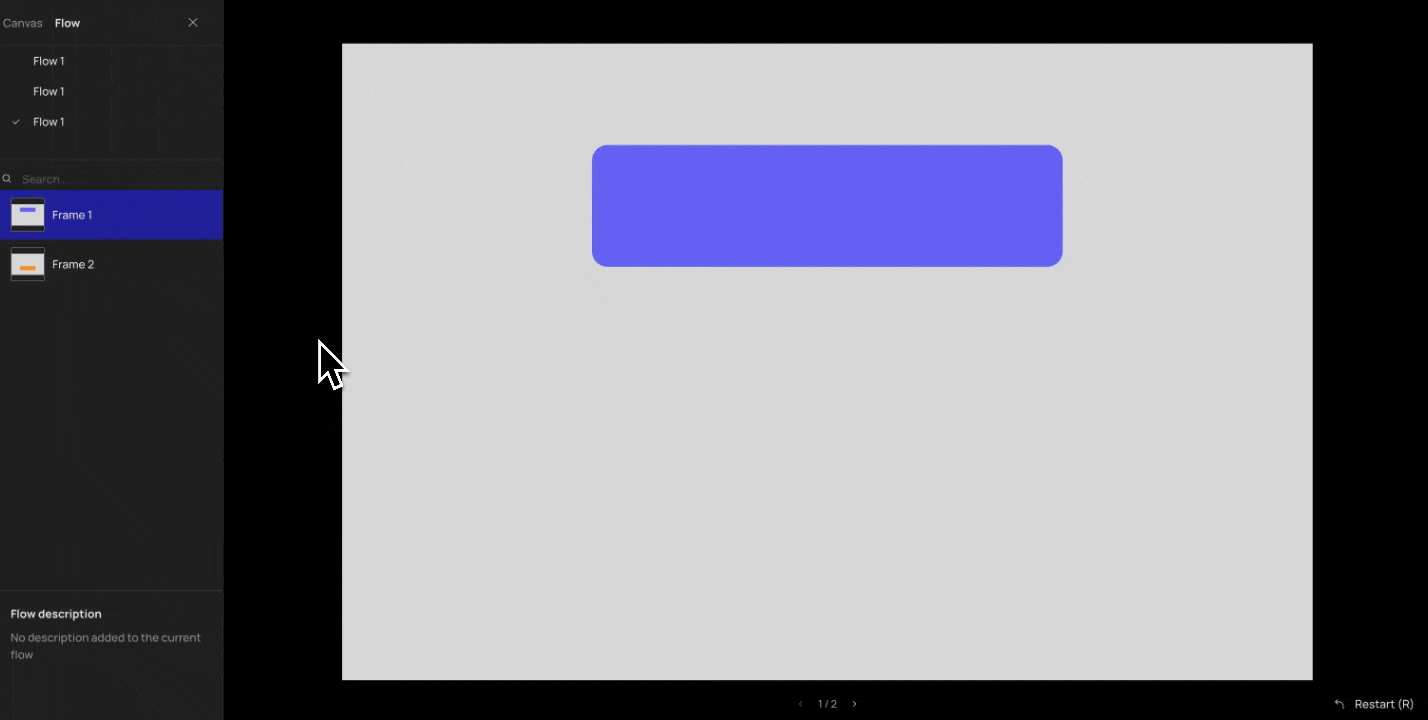
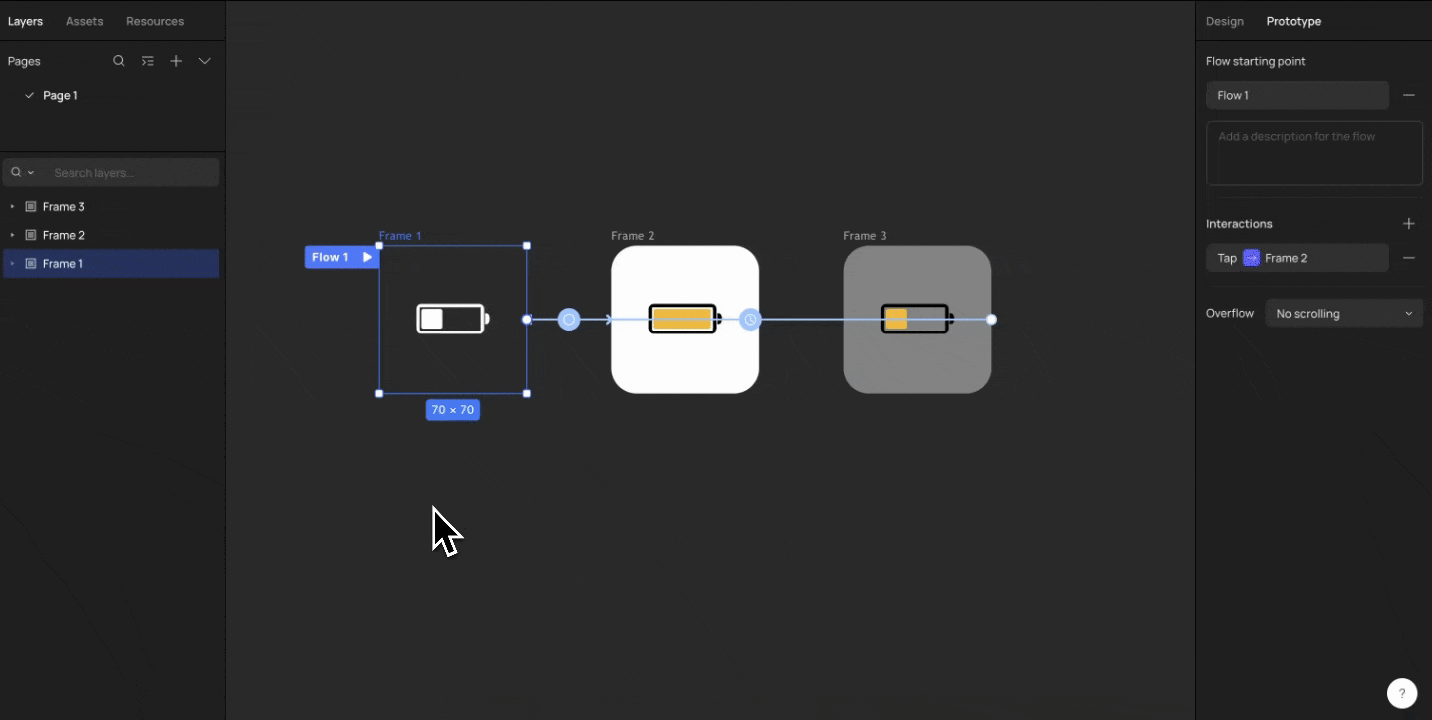
Example:
After designing three keyframe pages like the ones below and applying smart animate to them, you can achieve a natural and smooth effect of enabling low battery mode.
Effects
Effect refers to the change in speed set for an interaction animation.
Effect types
Creatie supports the following types of effects:
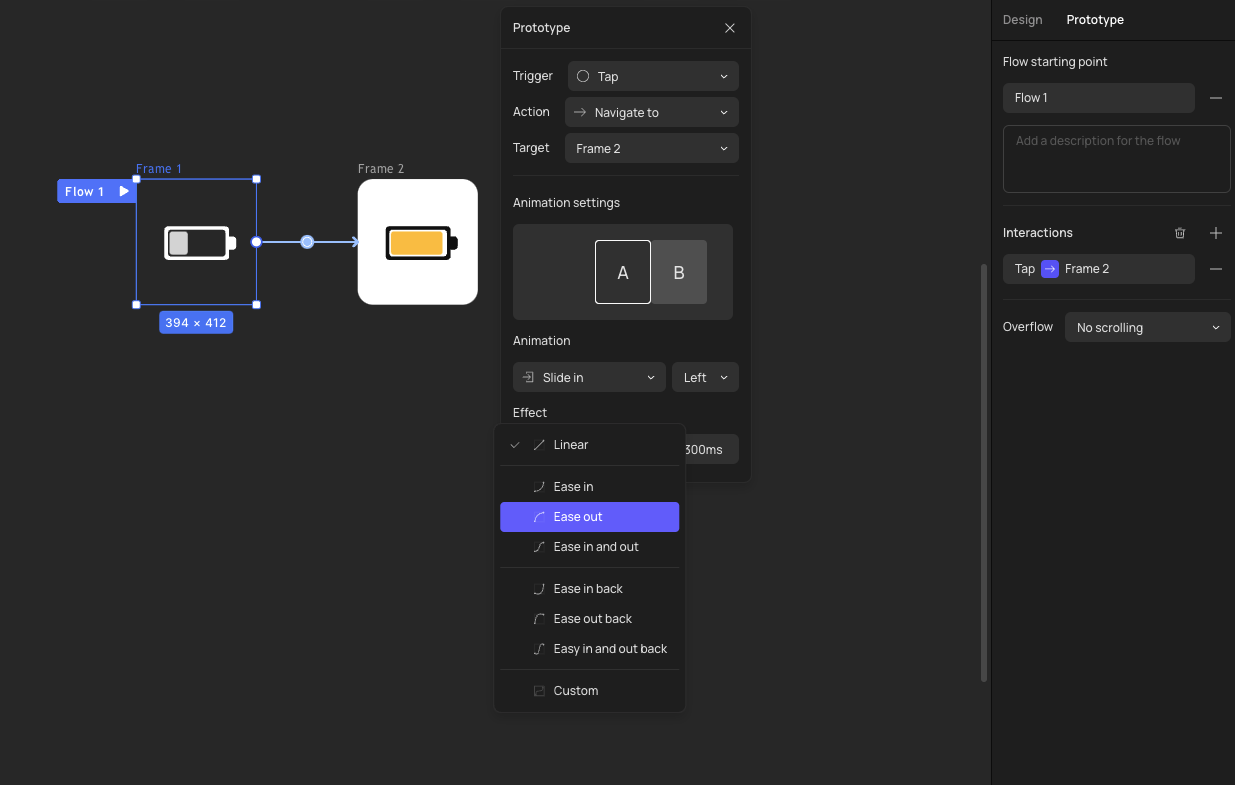
- Linear
- Ease in
- Ease out
- Ease in and out
- Ease in back
- Ease out back
- Easy in and out back
You can also customize the effect for more flexible visual changes.
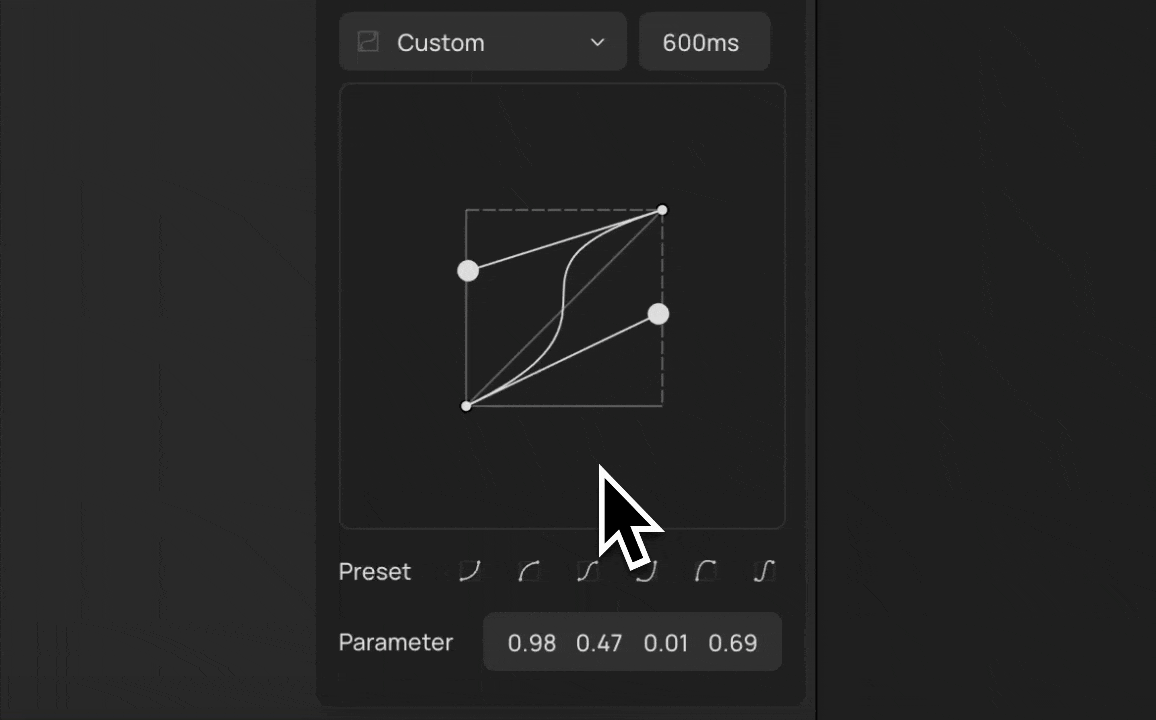
Using custom easing
The custom easing function allows you to draw your own easing curves.
The easing curve, the X-axis represents the time the effect takes, and the Y-axis represents the value of the animation (such as the opacity change of dissolving). The steeper the slope, the faster the speed, and the gentler the slope, the slower the speed.
Select Custom in Effect menu, three modules will appear from top to bottom: Curve drawing, Preset curve, and Curve parameters.
-
Curve drawing
The two black dots diagonally are the two endpoints of the curve and cannot be moved. The other two black dots are two drawing handles. Holding down a handle turns it blue, and dragging this handle allows you to modify the shape of the curve.
-
Preset curve
Clicking on any preset curve will display that curve in the curve drawing area above, and the curve parameters below will also change accordingly.
-
Curve parameters
There are 4 values in total, corresponding to the position of the two drawing handles (x1, y1) and (x2, y2). You can modify these values to change the shape of the curve. You can input an x value ranging from 0 to 1 and a y value ranging from -10,000 to 10,000.
👍🏻 Helpful or 👎🏻 Not Helpful
👉🏻 Was this article helpful to you? We look forward to your feedback.
👍🏻 Helpful
👎🏻 Not Helpful