Shape tools
The shape tools are in the toolbar at the top of the canvas.
You can select the shape tool in the dropdown menu or press the corresponding shortcut key, and drag on the canvas to draw the shapes you need.
Tips for using shape tools
- Hold down
Shiftwhen creating an equilateral layer or create a line along a 45° angle - Hold down the key (Mac:
Option/ Windows:Alt) to create and resize shapes from their center - Hold down
Shiftand the key (Mac:Option/ Windows:Alt) at the same time to do both actions
Shape tool types
Creatie supports the following types of shape tools:
- Rectangle: the basic shape and probably the most used one
- Ellipse
- Line
- Polygon
- Star
Rectangles
Select Rectangle from the shape tools menu, or press R to create both rectangles and squares.
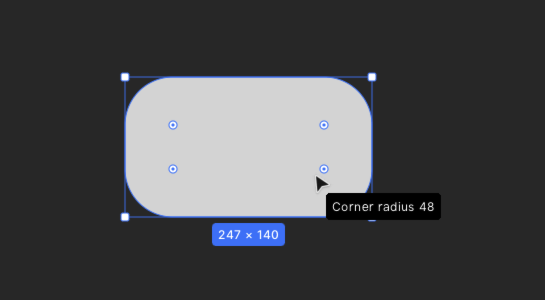
Adjust the corner radius
You can adjust the corner radius of a rectangle in the properties panel or on the canvas. To adjust the corner radius on the canvas:
- Select the rectangle, four anchors will appear in the rectangle.
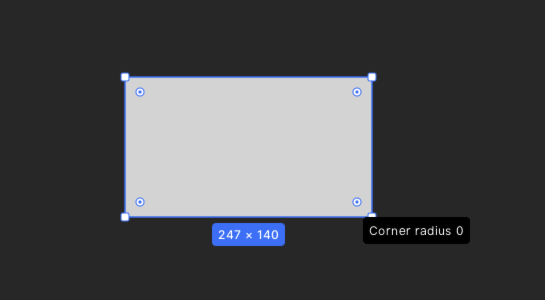
- Hover your cursor over any anchor, and you can see the corner radius, with the default setting at 0. Drag any point towards the center of the rectangle to make the corner rounded. You can also hold down the key (Mac:
Option/ Windows:Alt) to drag a single corner.
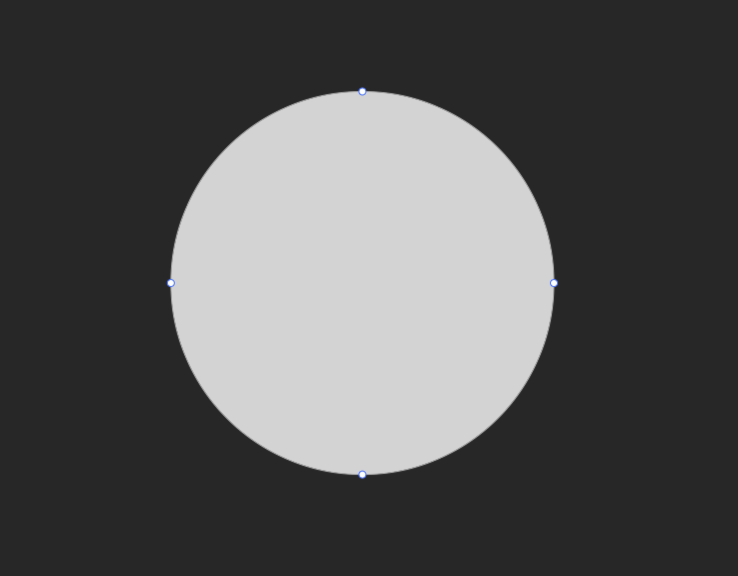
Ellipses
Select Ellipse from the shape tools menu, or press O to draw an oval or a circle.
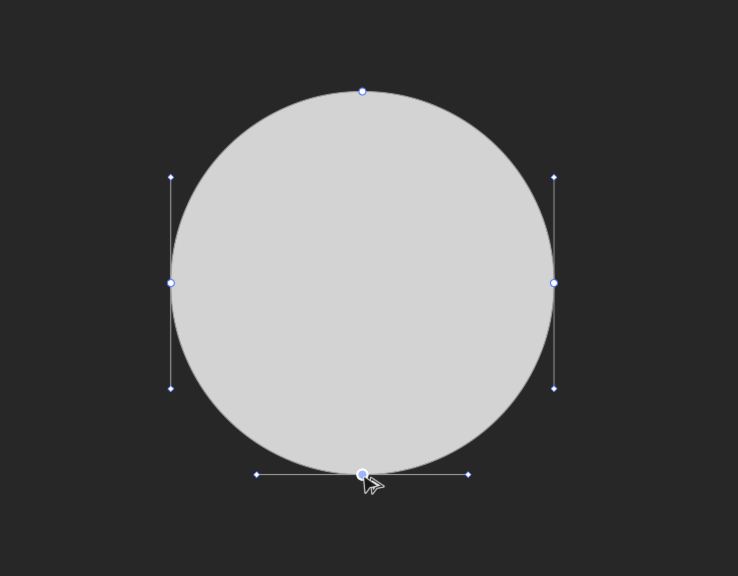
Create semi-circles
- Double-click on the circle to enter Edit mode
 2. Click to select one of the points, then press
 Delete
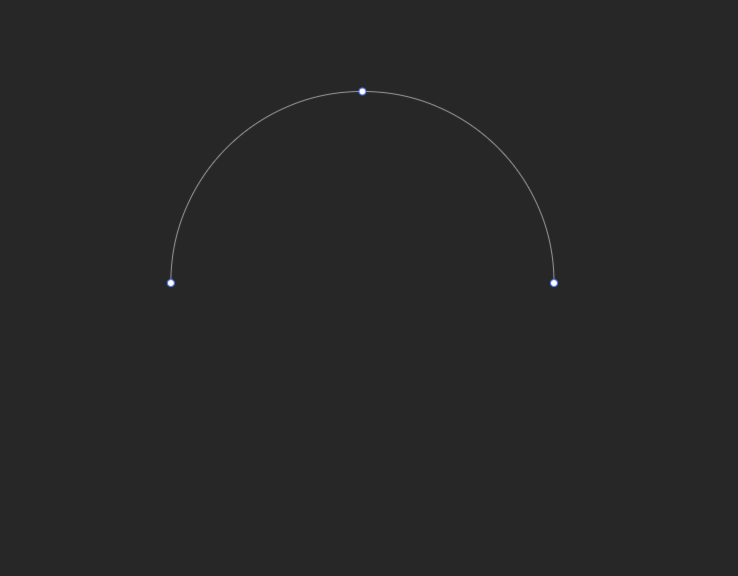 3. Click the shape tools in the top toolbar, select the pen tool (shortcut:
 P ), connect the two points to close the semi-circle
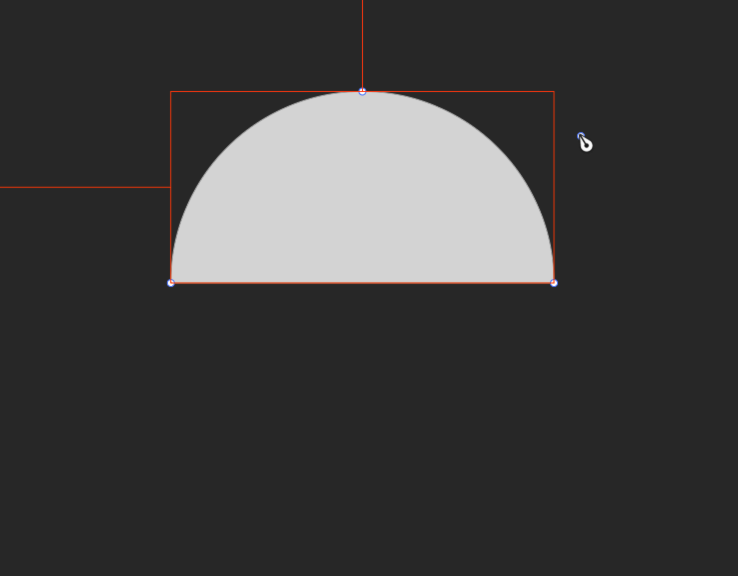
Note: There is another way to complete step 3. Drag to select the two points you would like to connect, use the Join anchor points shortcuts (Mac:
Command+J/ Windows:Ctrl+J) to close the semi-circle.
Lines
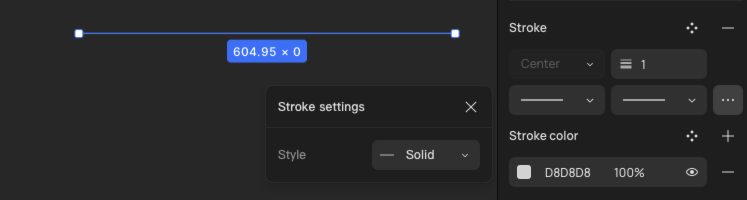
Select Line from the shape tools menu, or press L to create lines. Click on a spot in the canvas and drag in any direction to create the line.
You can modify layers' visual characteristics, including the color, opacity, width, and end points styles, in the right sidebar.
You can also create dashed lines by selecting ··· icon on the far right.
Polygons
The default shape for the polygon tool is a triangle, but you can switch between polygons by adjusting the number of angles in the right sidebar. For example, entering 6 in the angle input box can turn a triangle into a hexagon.
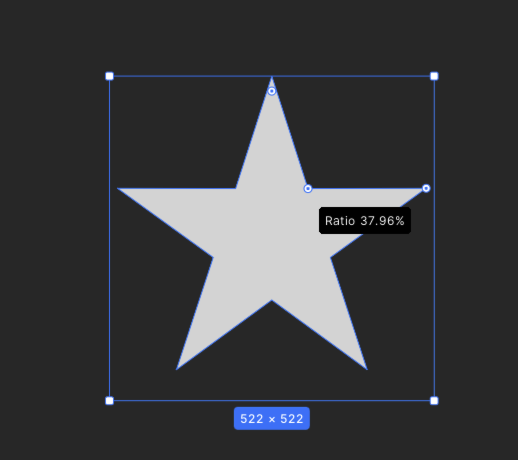
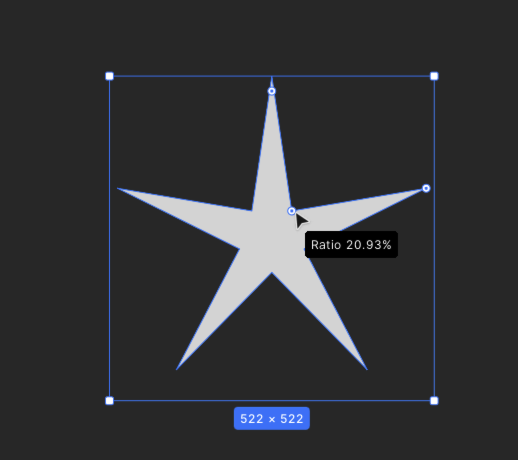
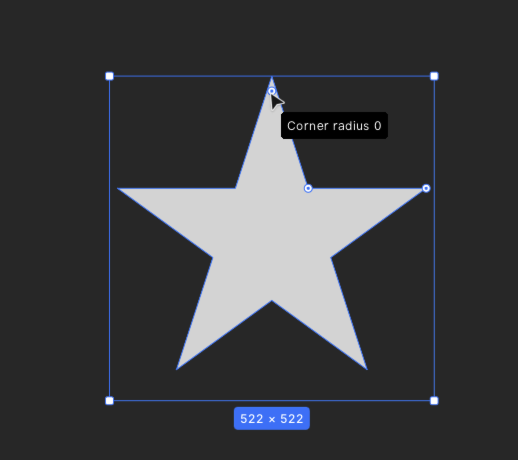
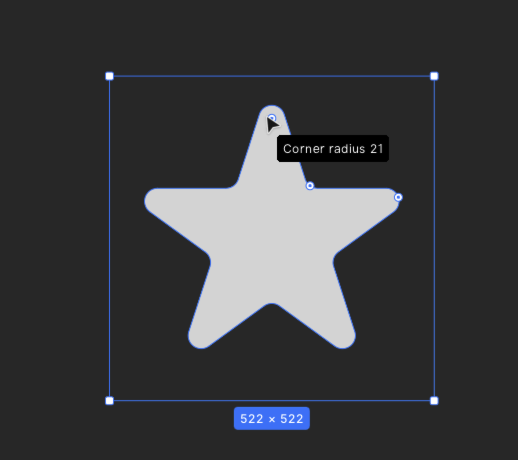
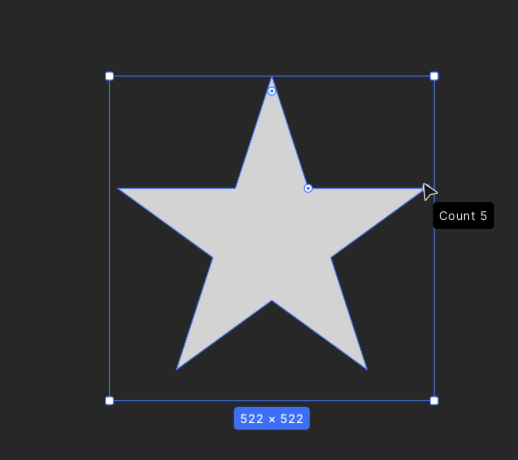
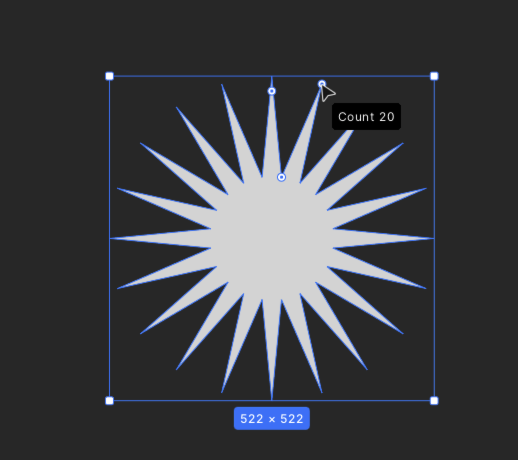
Stars
When you create a star layer, the default will be a five-pointed star with ten sides.
- You can adjust the distance of the inner points of the star from the center by dragging the handle in the middle, and the percentage of the star’s diameter will be shown on the canvas.
- You can adjust the radius of the rounded corner of the star by dragging the handle on the top.
- By dragging the rightmost handle, you can change the number of star points. You can try sliding your fingers on the trackpad when dragging the handle.
👍🏻 Helpful or 👎🏻 Not Helpful
👉🏻 Was this article helpful to you? We look forward to your feedback.
👍🏻 Helpful
👎🏻 Not Helpful