Export from Creatie
You can export your designs and assets in Creatie in multiple format, including PNG, JPG, PDF, WEBP, and SVG.
Export layers from Creatie
To export your designs and assets from Creatie:
- Select the layers you want to export.
- Click the + in the export section at the bottom of the right sidebar
- Configure the export settings
- Click the Export button at the bottom
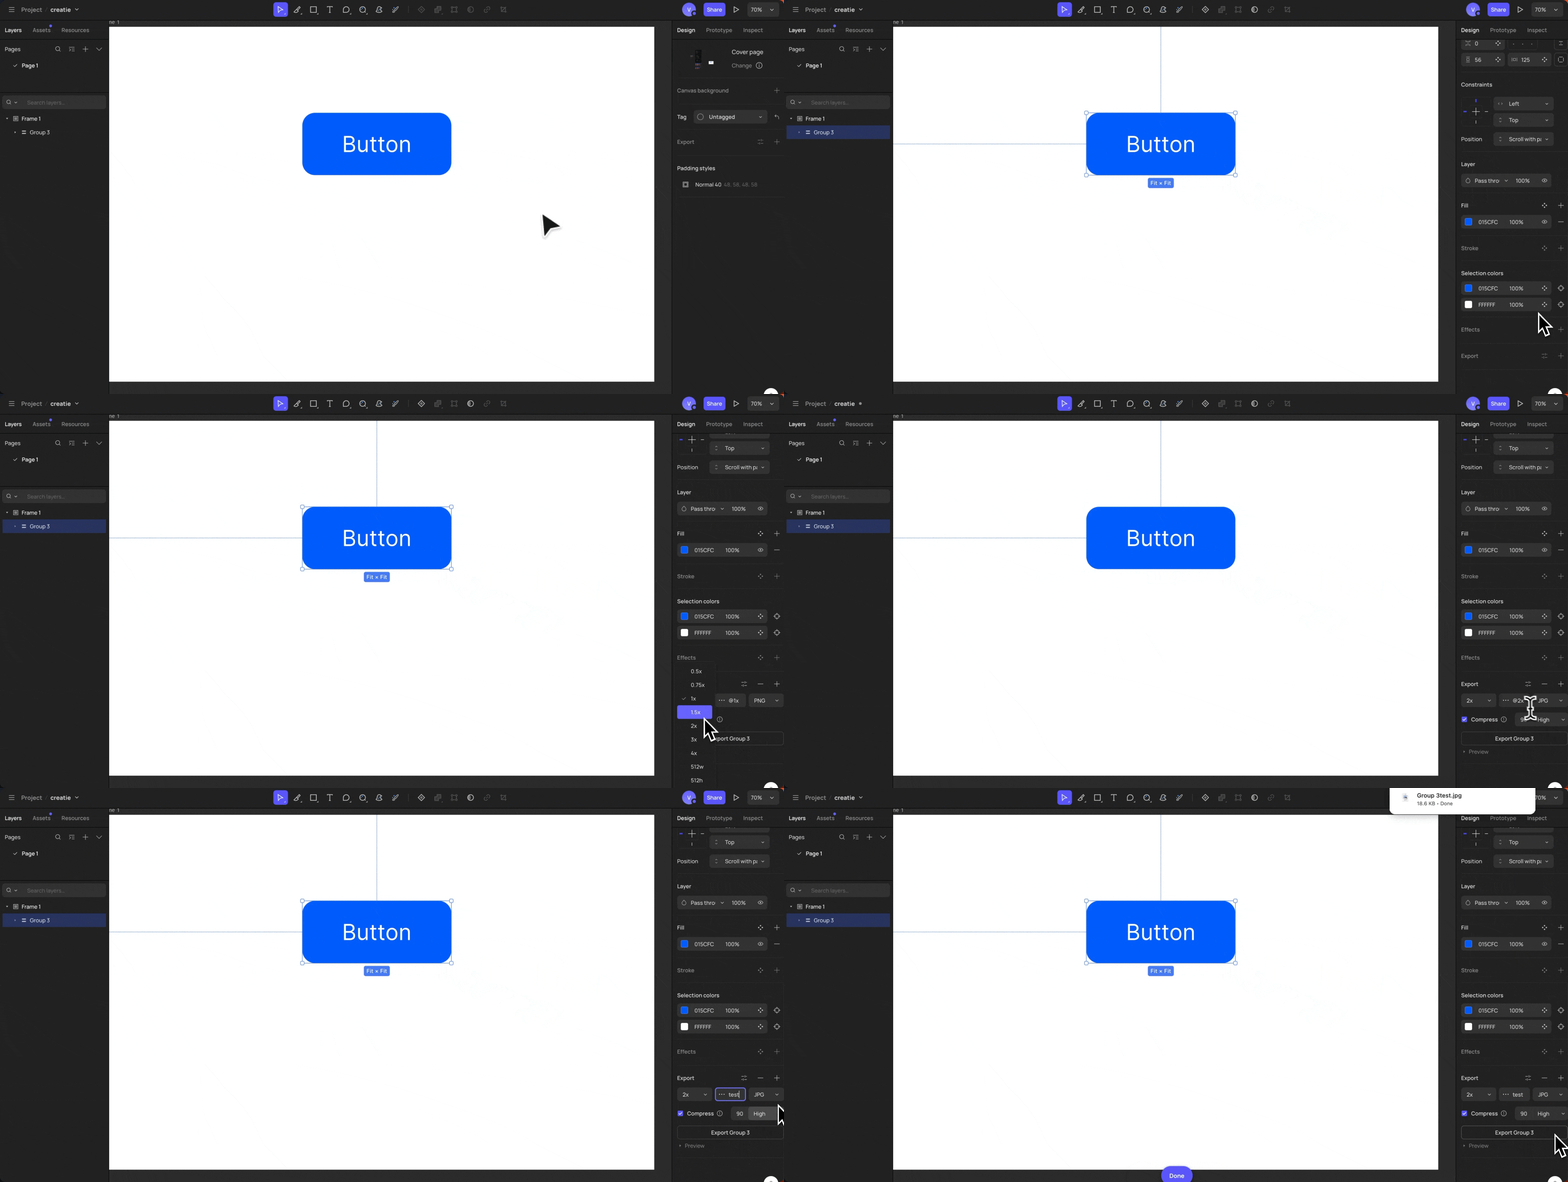
Export settings
To facilitate product managers, especially developers, in viewing exported images, you can configure the export settings before exporting layers.
-
Set export scale For example, choosing 2x means the exported image size is twice the size of the original layer.
-
Set the prefix/suffix of the exported image name By clicking ···, you can switch between setting the prefix and suffix of the exported file name. This makes it convenient to add information such as size to the file name.
-
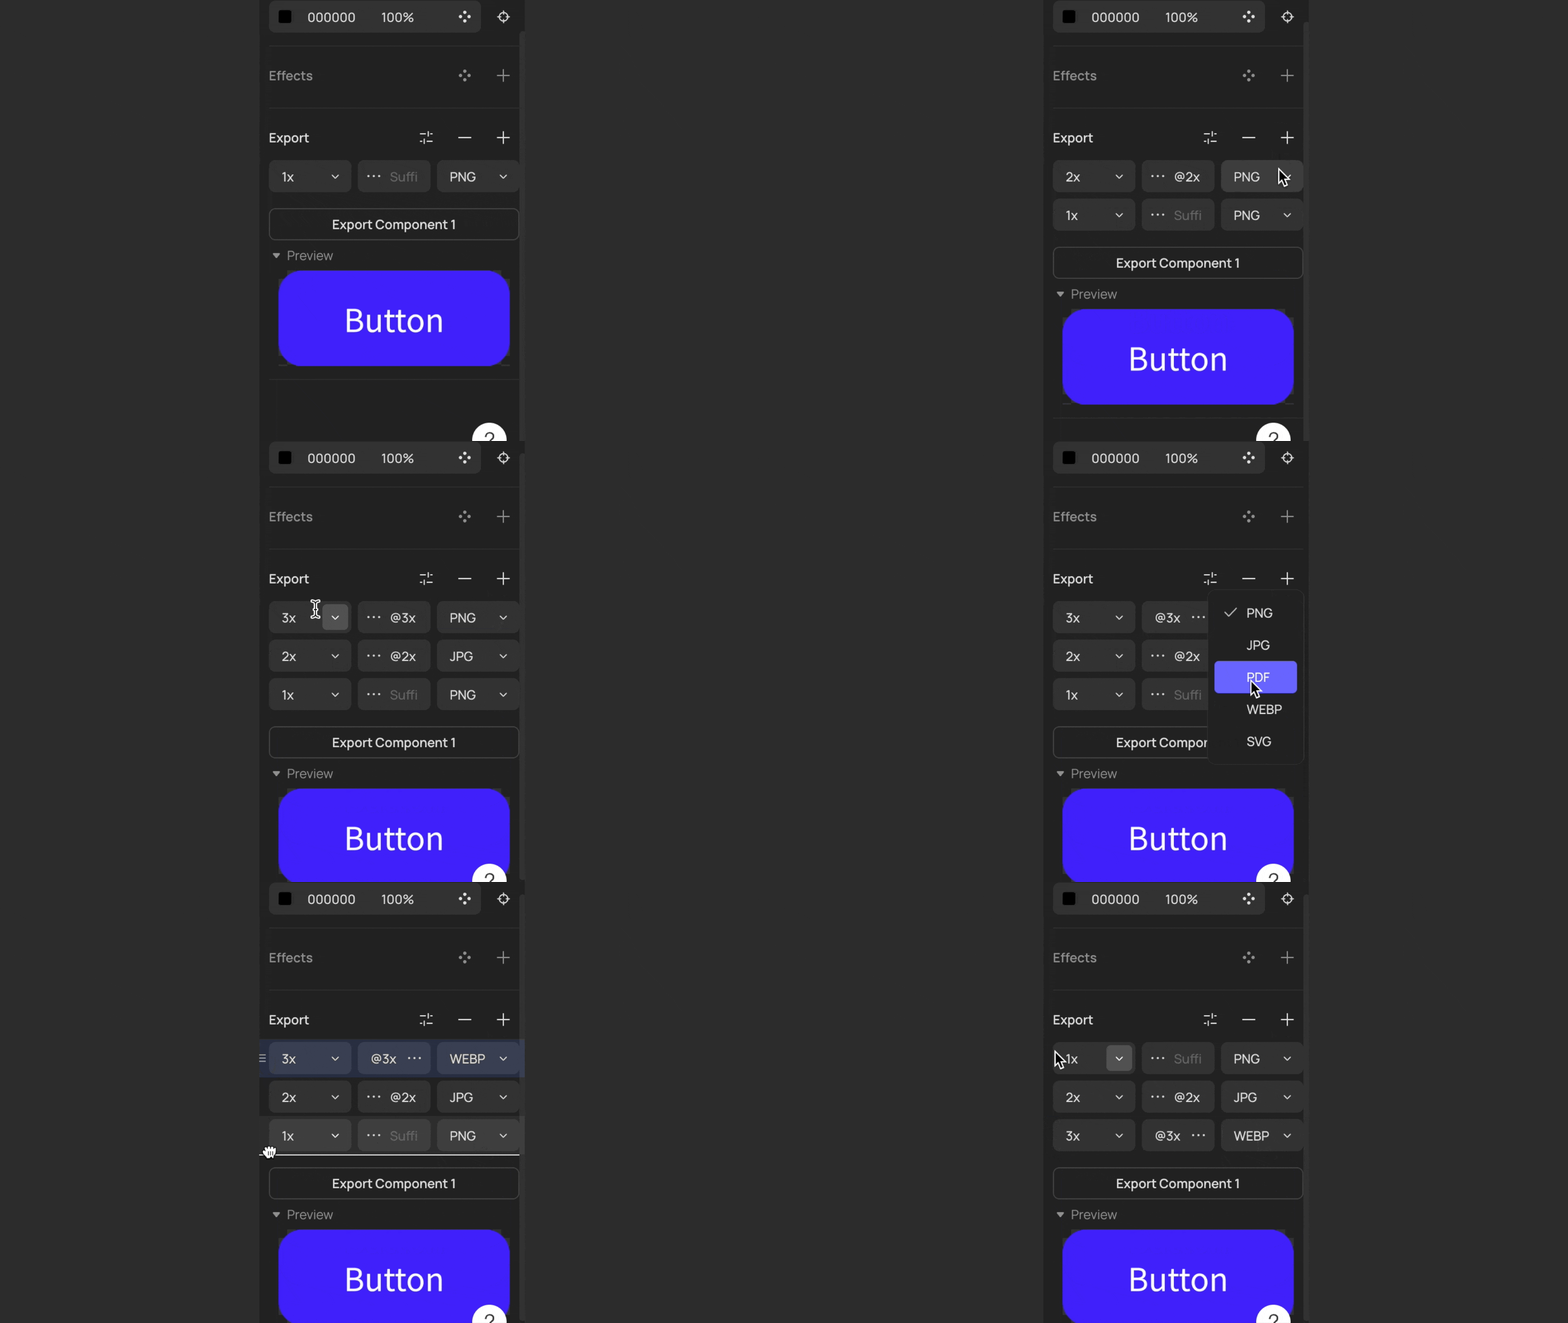
Select the format
-
PNG: A lossless compressed bitmap image format commonly used for Java and web pages, etc., with high compression ratio, and small file size.
-
JPG: Common bitmap image format with lossy compression, resulting in some compression of image quality.
-
PDF: Common electronic file format based on the PostScript language image model.
-
WEBP: Commonly used for the web, provides both lossy and lossless compressed image formats. It helps compress web graphics, making them load faster on webpages without losing clarity or compatibility.
-
SVG: A vector graphic format based on XML used to describe two-dimensional vector graphics, supports infinite scaling without distortion.
-
Note: When you export in JPG and WEBP formats, you can check the Compress setting and select your desired compression effect to compress the images you are going to export.
-
Adjust the order of multiple export objects Hover over the leftmost part of the export item, hold down and drag the bar to adjust the order
-
Preview Click Preview to see what the exported image looks like
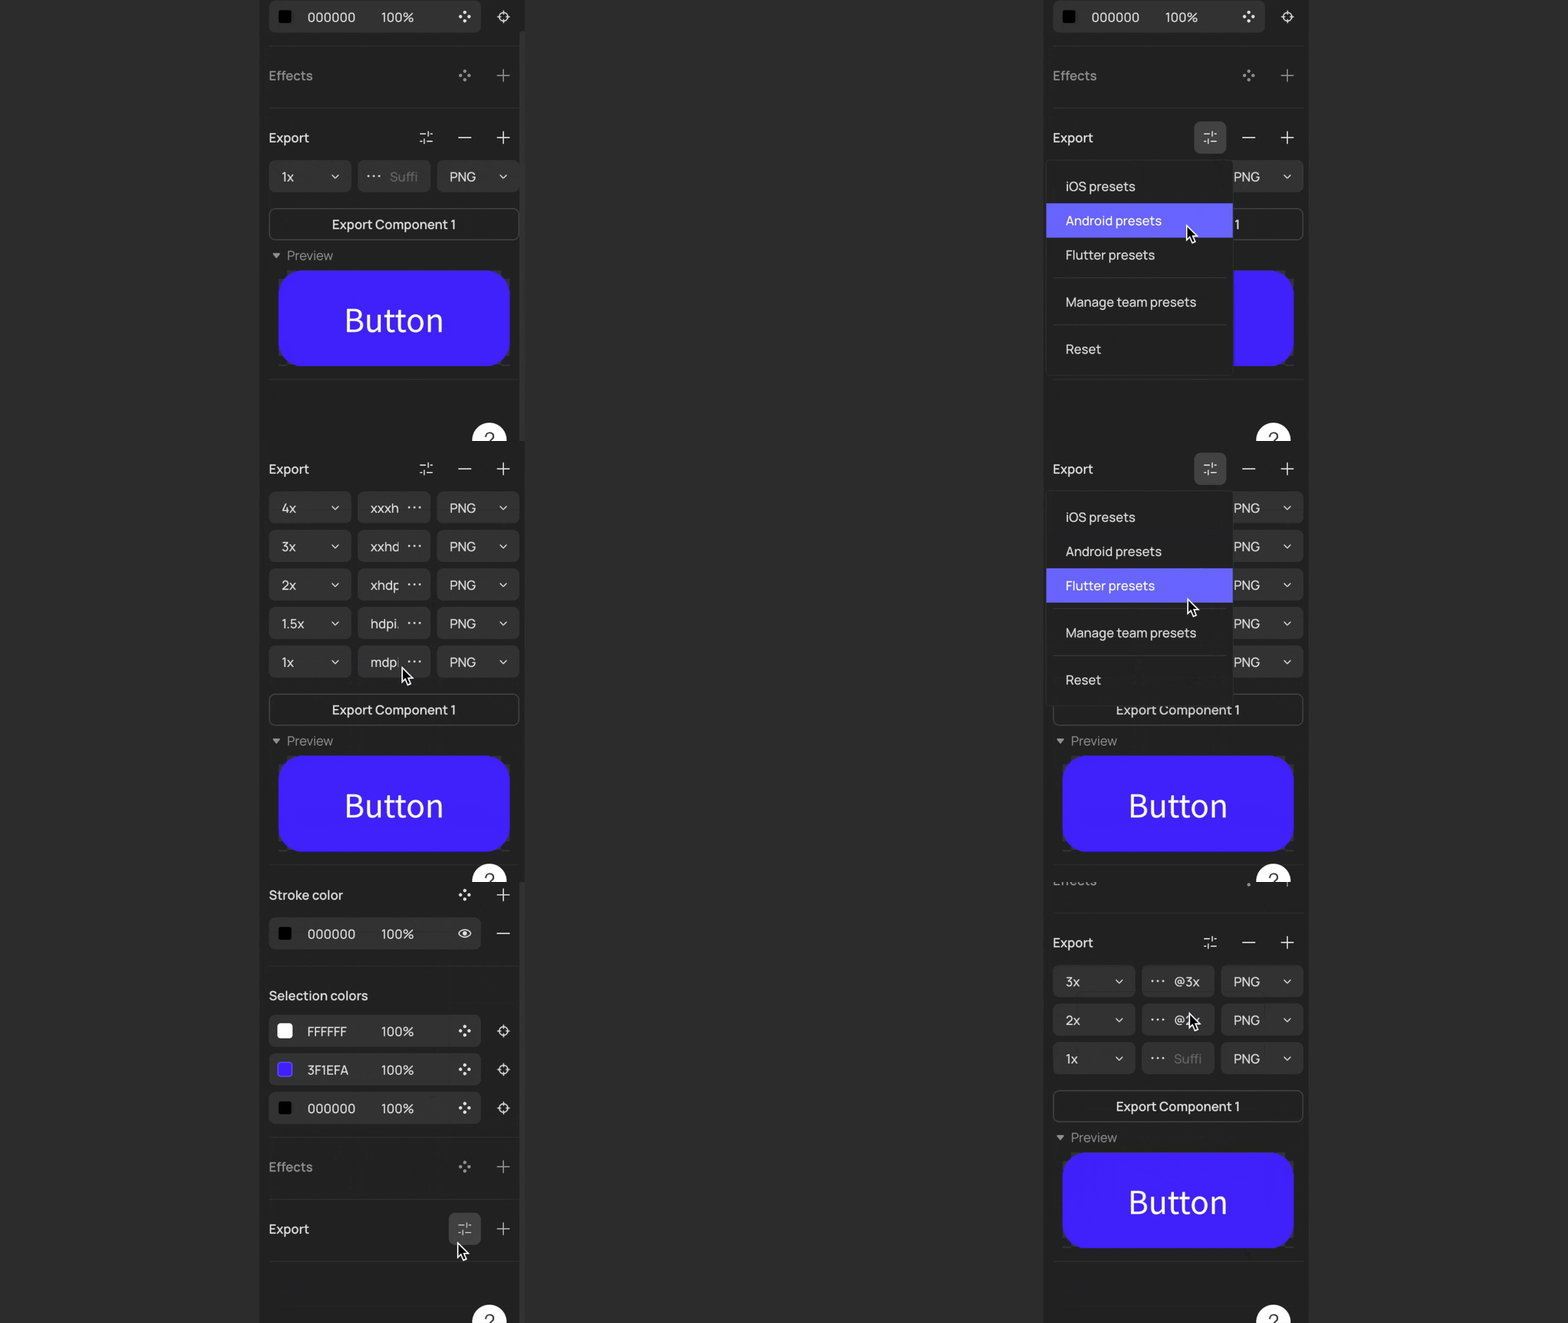
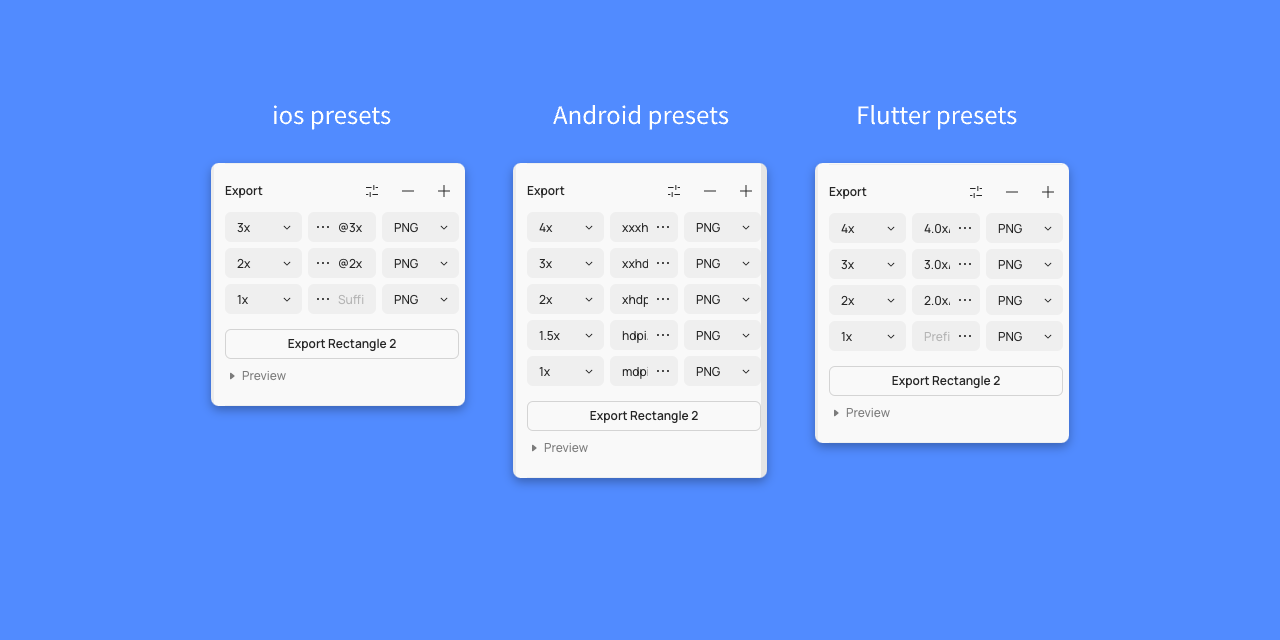
Export presets
Specific preset formats may improve your collaboration with develops. Creatie provides 3 commonly used export presets:
- IOS presets
- Android presets
- Flutter presets: Flutter is a popular framework to build the UI.
- Customized presets: You can select Manage team preset and add a customized preset for your team
Use the slice tool
With slice tool, you can marquee select any area in the canvas to turn this area into a slice, and export this layer.
To activate the slice too, select Slice in the toolbar menu under Frame or press the shortcut key S.
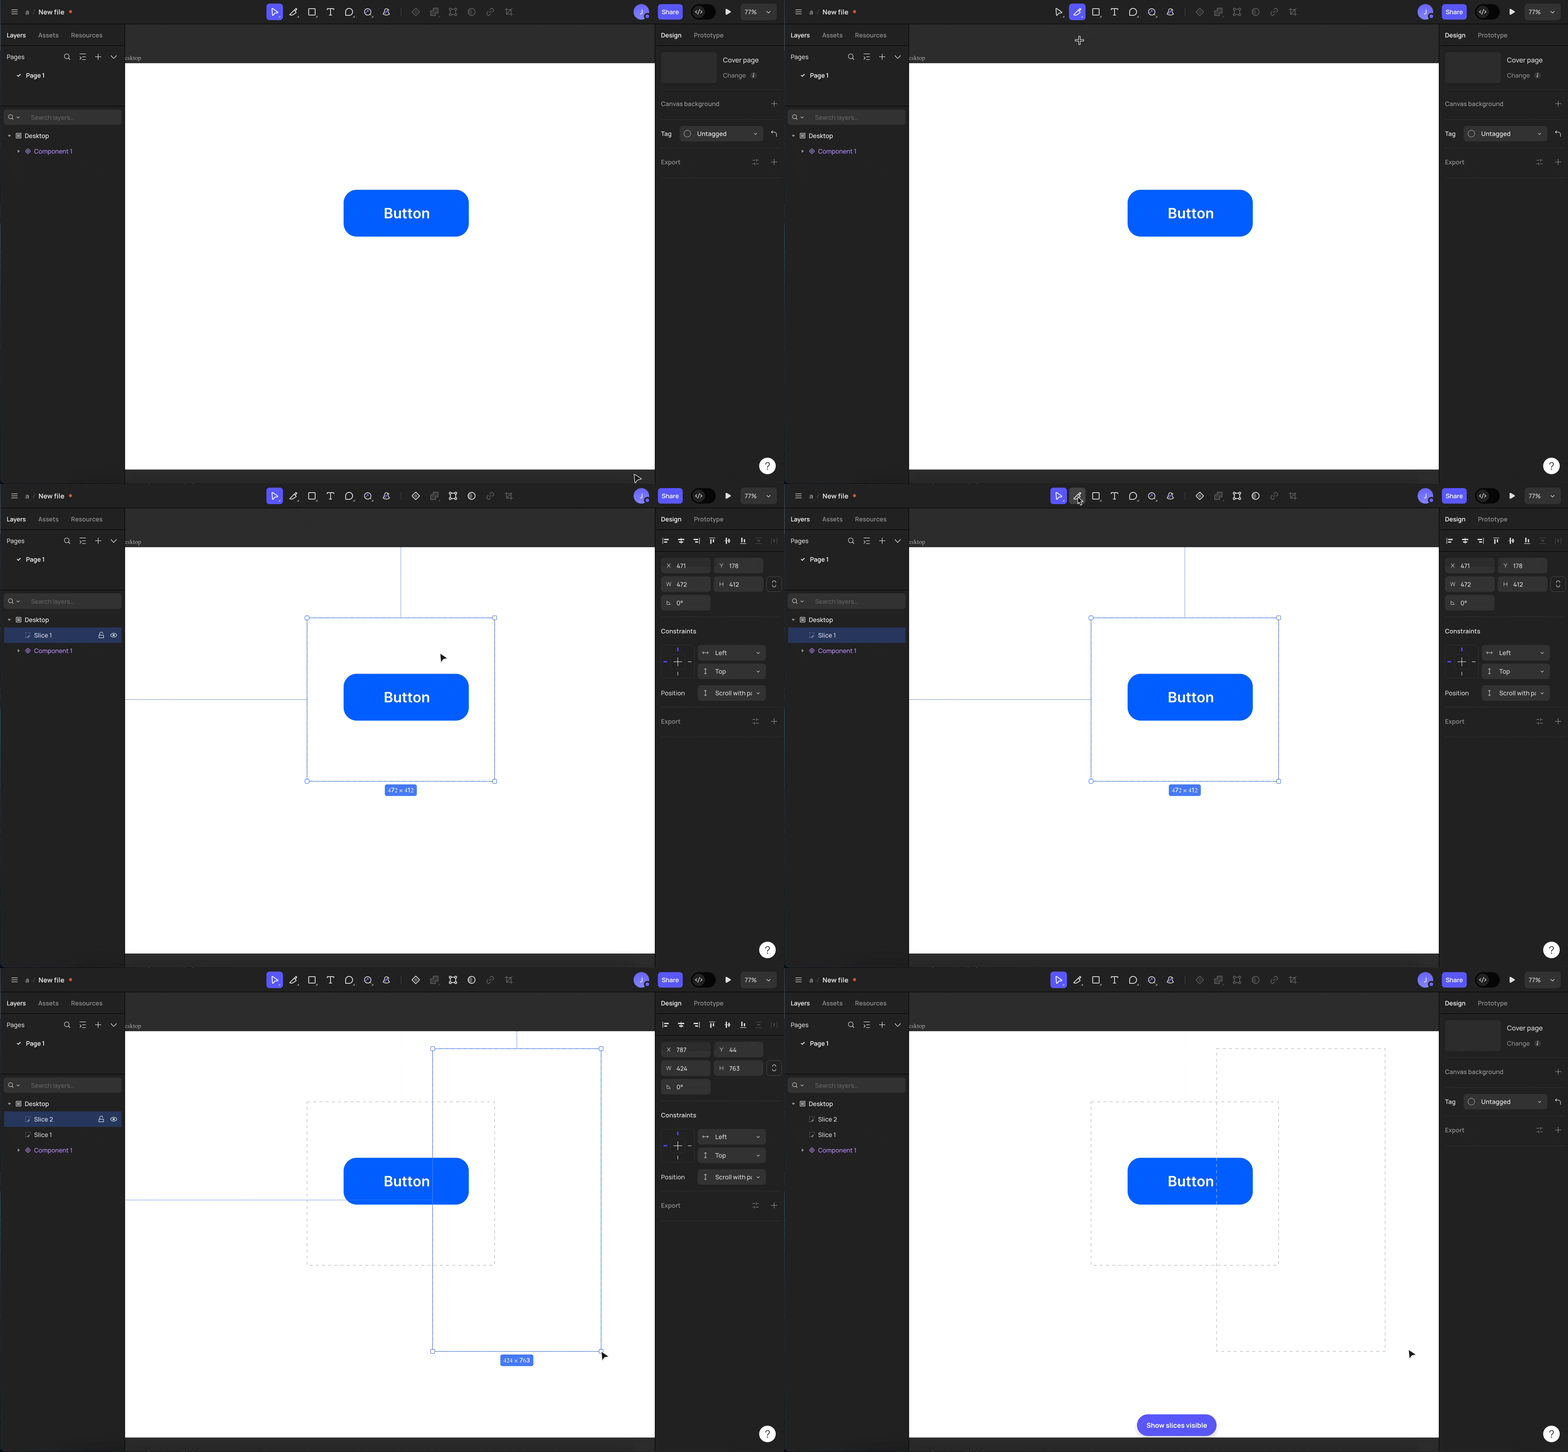
You can show / hide slices in the canvas by checking or unchecking Show slices in view options in the top right corner of the canvas, or use the shortcut key Shift + S
Export in bulk
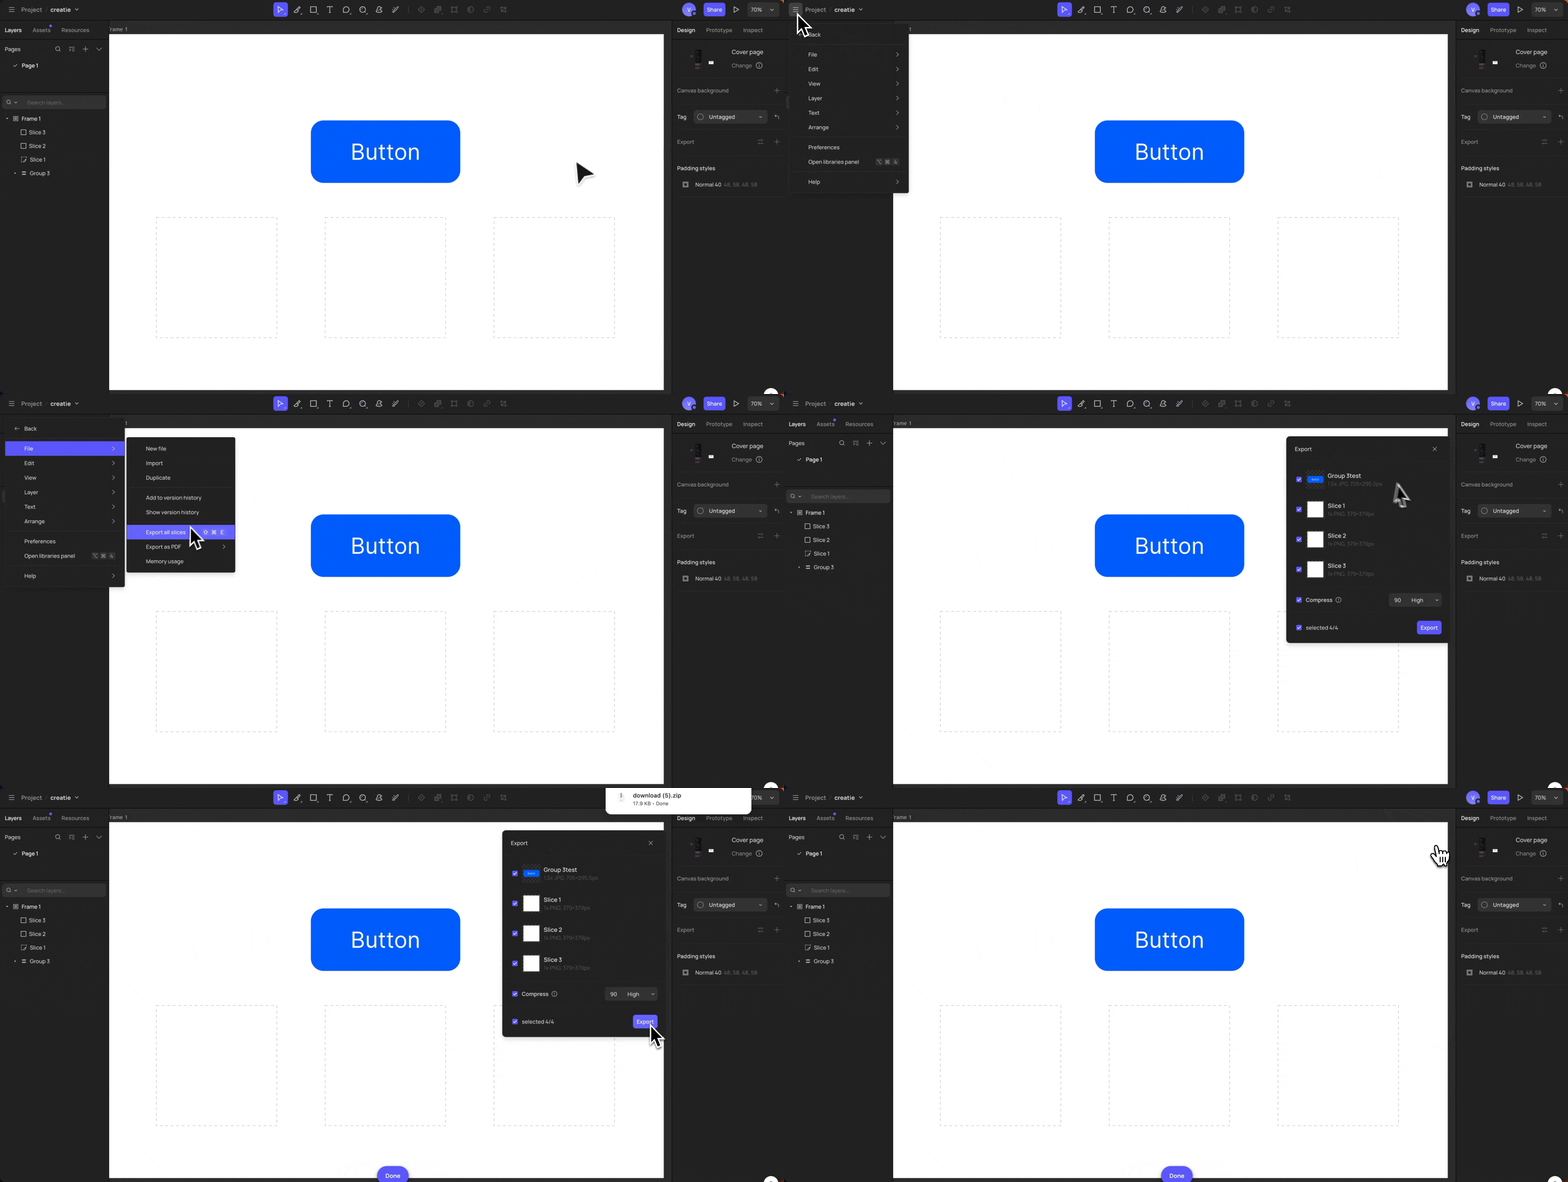
If you want to quickly export all slices in the file, you can click the menu bar in the top left corner and select File > Export all slices, or use the shortcut keys (Mac: Shift + Command + E / Win: Shift + Ctrl + E).
Note: Only slices with export settings will be exported. Slices without export settings will not be exported.
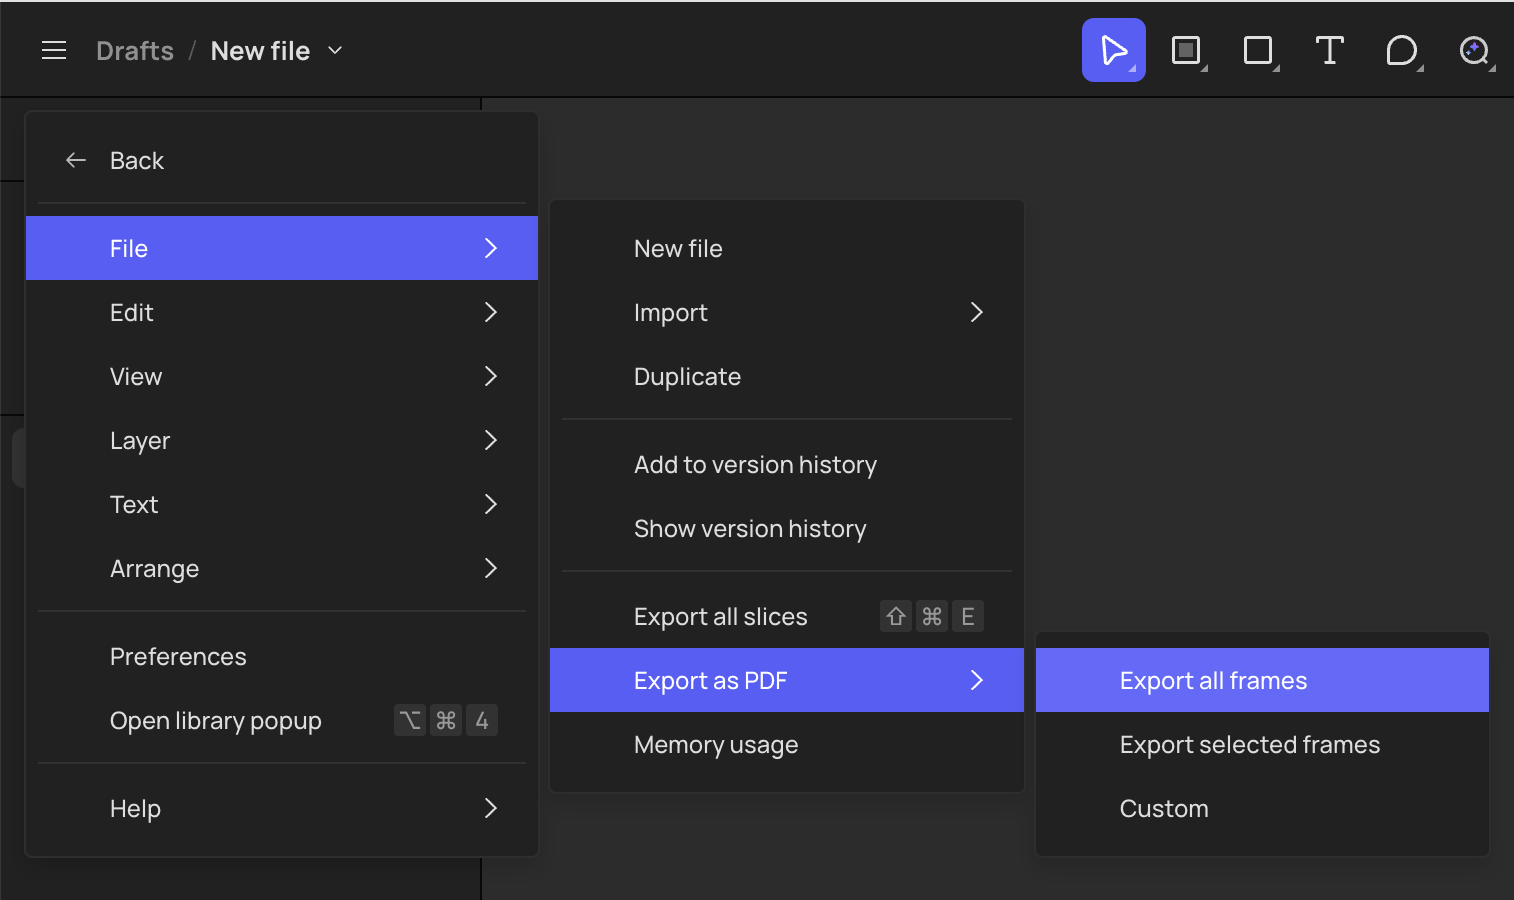
If you want to export top-level frames as PDFs, you can click the menu bar in the top left corner and select File > Export as PDF.
👍🏻 Helpful or 👎🏻 Not Helpful
👉🏻 Was this article helpful to you? We look forward to your feedback.
👍🏻 Helpful
👎🏻 Not Helpful